Welcome to the GoAnywhere MFT administrator interface tour. This tutorial will step you through the browser-based administrator highlighting Dashboards, User Management, Workflows, File Transfer Services, and Reporting.
GoAnywhere MFT's browser-based screens are written in the latest HTML 5 technology and allows your enterprise to automate workflows, setup file transfer services, manage user accounts, configure security settings, monitor logs, and more.
Not using GoAnywhere MFT yet?
Start a free trial and test it out for 30 days.
or request pricing to learn more
Dashboard

Every Admin User logs directly into their personal Dashboard, which contains popular shortcuts and critical information. GoAnywhere provides dozens of dashboard gadgets that display vital statistics and activity for your system. Admin users can customize and add gadgets, organize their layout, and even share dashboards with others.
Every page in the administrator contains a link to the comprehensive GoAnywhere help system - for instant access to in-depth procedures, button and field definitions, and Project examples. Additional support resources are available from the Help Center located in the Help menu.
User Management

To get started you need to create Admin and Web User accounts. After you log in for the first time, visit the Users menu and create Admin Users to manage Projects, Resources, and the file transfer services.
Admin Roles allow you to assign GoAnywhere functions to authorized users. For example, you can have one user with the ability to create Projects, while another user may only be allowed to view audit logs.
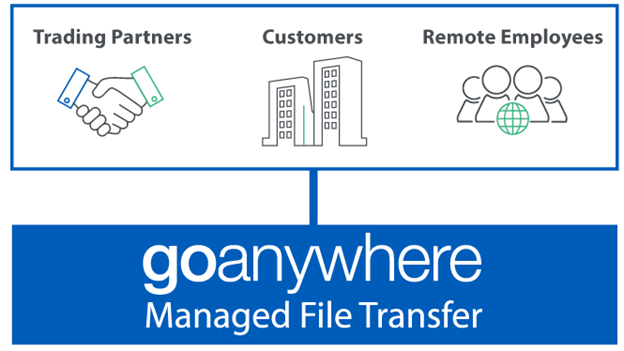
Web Users are accounts that can access GoAnywhere for exchanging files using FTP, FTPS, SFTP, AS2, and HTTPS protocols. These could be your trading partners, customers, employees, and end-users. When a Web User is created, you grant access to licensed features and permissions from their account profile.
Provisioning accounts is easy with the use of templates which automatically defines the settings and features granted when a Web User is created.
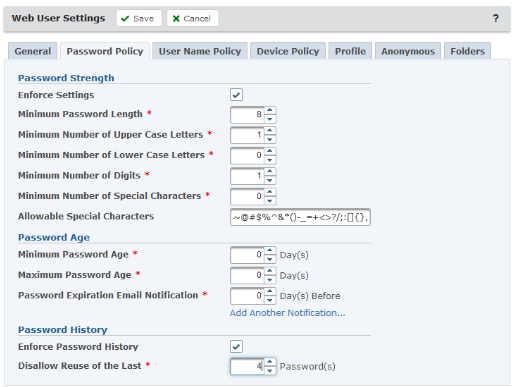
Both Admin and Web Users can be added to Groups with similar rights and responsibilities. There are also Admin and Web User security settings that can be customized for each user type.
By default, Admin User and Web User passwords are authenticated against the passwords stored in the GoAnywhere database. Optionally, you can configure GoAnywhere Login Methods for authentication of Admin User and Web User passwords against a Windows Active Directory, a Generic LDAP, or an IBM i (iSeries) located within your organization. Web User accounts can also be synchronized with users stored in an LDAP server.
Once users are defined, you can begin configuring your workflows and file transfer services.
Resources

Resources are where you define the connection properties of the servers and data sources that GoAnywhere can interact with for your workflows. Once a Resource is defined, it can be used in your project workflows without exposing connection information or passwords to project designers or other Admin Users.
Workflows

The Workflows menu contains all the features you'll need to create and automate your business processes and file transfers.
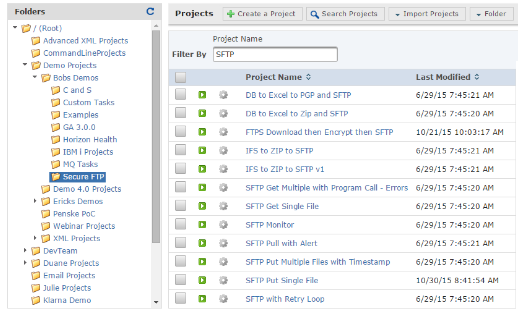
From this menu, you can create projects, organize projects into folders, and secure the folders to make them accessible only to authorized users.
At the heart of GoAnywhere's automation functions are the Scheduler, Monitors, and Triggers. They allow for the scheduling of Projects to run at future dates and times, when files are created or modified in monitored directories, or as a result of activity that occurs in the system, such as when a file is uploaded or downloaded.
The Job Queue Manager lets you control job volumes by prioritizing and grouping Jobs that are waiting to be executed in GoAnywhere.
Queued, Active, and Completed Jobs let you monitor the activity of jobs from end-to-end as they process through GoAnywhere.
Services
Services are used for managing inbound connections and file sharing features for your trading partners, customers, and employees using SFTP, FTP, FTPS, HTTPS, and AS2.

The Service Manager is where you edit the configuration settings for each protocol. If you're using the HTTPS Web Client, this is where you can configure the custom logo, enable international language translations, or configure SAML single sign-on.
The Gateway lets you route services through the reverse and forward GoAnywhere Gateway proxy.
GoDrive Settings and the Device Manager allow you to configure on-premises file sharing and synchronization services that are available using the Web Client and GoDrive devices. You can choose how long to store deleted files, setup sharing notifications, enable device policies, and choose how content is displayed. The Device Manager is where you approve or deactivate devices connected to the GoDrive service.
Secure Mail Settings and the Package Manager let you configure settings that allow Web Users to send ad-hoc messages. These emails contain links to download files directly from the GoAnywhere server. You can set password policies and expiration dates, allow message replies, restrict email addresses, and set rules for the Secure Mail Outlook Plugin.
The Package Manager page provides a detailed view of all Packages that were created by Secure Mail. This detail includes when the package was sent, opened, and how many times the files were downloaded.
Logs

Once you have Projects and Services configured, you'll want to monitor their activity through the Logs and Reports.
Using the reporting feature in GoAnywhere, PDF reports can be created interactively or automatically that contain system, Project, and Web User activity.
The Audit Logs page allows Admin Users to view and search logs for each service the Admin User has permission to access.
The Log Settings and Log Exemption pages allow you to specify the data the logs collect, as well as where and how long they are stored. You can also send log messages to a syslog server.
Encryption

Securing data in transit and data at rest begins in the Encryption menu where you will find the Open PGP, SSL, and SSH Key Manager for encrypting files or securing connections. The GoAnywhere help system has quick start instructions for creating and using these security features.
You can also define folders that automatically encrypt data at rest, encrypt passwords or phrases for projects, or enable FIPS 140-2 Compliance.
System
Managing the GoAnywhere system is done from the System menu. You can work with files through the File Manager, change environment settings, specify directory locations, and modify email settings through the Global Settings page.
The database that GoAnywhere uses to store logs and configurations can be migrated to SQL Server, MySQL, Oracle, and other databases using the Switch Database Wizard. You can also view other GoAnywhere systems in your cluster, install custom tasks to be used within Projects, define system alerts, configure IP blacklists, and so much more.